SOP - Setting the user rights in Windows 11
Note:
This SOP was prepared and tested on the computer with Windows 11 Pro operating system (English localization), with the latest updates (as of 31.10.2025) installed.
This process must be performed by a person with Administrator privileges (e.g., an IT specialist). It assumes that the computer is freshly installed with no user accounts other than the administrator one. Clarity is supposed to be already installed. If user accounts already exist (for example, when the computer is connected to a domain), apply the same procedure to those existing accounts.
- Open Computer Management: Right-click the Start menu and select Computer Management. In the left panel, navigate to Local Users and Groups - Users.
- Create a new user account: Right-click the Users item and select New User... from the context menu. Fill in all required fields in the New User dialog, set a password according to your organization’s policy and click the Create button.
- Repeat this procedure for each additional user you want to add. Close the New User dialog by clicking Close.
- Create a group for all user accounts that will use Clarity.
- Navigate to Local Users and Groups - Groups section.
- Right-click the Group and select New Group... from the context menu and add its description. Then click Add to manage members.
- Click Advanced in Select Users dialog. Select User (Advanced) dialog is opened.
- Click Find Now and select all users you want to add from Search results: list at the bottom of the dialog.
- You can verify which users are members of the group in the group properties.
- Then it is necessary, to perform first login for all newly created users. This step is essential — performing it later can compromise the electronic security of Clarity records.

Computer Management
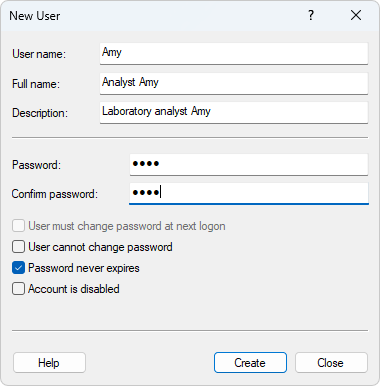
Create New User
Note:
It is not necessary to create a group for the users. It is recommended to do so if there are multiple users that are going to work with Clarity, but it is always possible to set necessary access rights directly for user accounts.
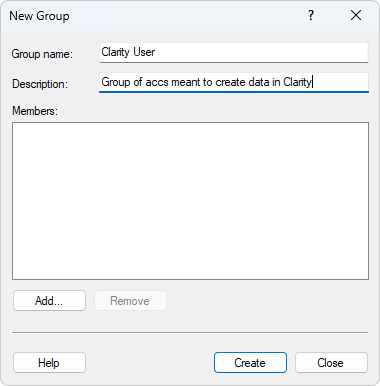
Users Group
Note:
During the first login, the newly created users are automatically added to the Authenticated User group. In order for Clarity to function under GLP, the Authenticated User must not have access to Clarity subfolders and thus this group must be deleted (which is explained in the steps below).
- Log back in as the local Administrator.
- Locate the Clarity installation directory. If the DataFiles subfolder is elsewhere, verify that it is properly setup using System Directories in Clarity.
- Set permissions for all user accounts you added earlier for the subfolders Cfg, DataFiles (wherever DataFiles subfolder is located) and Bin:
- Right-click on the subfolder Cfg and select the Properties from the context menu. Switch to the Security tab.
- Select Advanced and window Advanced Security Settings for Cfg opens.
- Click Change permissions button which will invoke new window for settings of permissions. Click Disable inheritance button and new Block inheritance window will be invoked. Click Remove all inherited permissions from this object option which will result in cleared out Permission entry in Advanced Security Settings for Cfg window.
- Click the Add button which will invoke new window for settings of the permissions. Click Select a principal to open Select User or Group dialog.
- Click Advanced... to open advanced dialog view.
- Click Find Now and select the group you created for Clarity users. If you didn't create any, select individual accounts.
- Click OK in the Select User of Group (Advanced) and Select User of Group dialogs.
- Click Show advanced permissions. Select the relevant permissions for the user accounts of those who will run Clarity.
- Repeat this procedure for Administrator user account and SYSTEM. Both should have all privileges.
- Final security settings for Cfg is displayed in image below.
- If needed, the settings can be reviewed for respective users/group from the Security tab in Cfg Properties window.
- Repeat this complete procedure for DataFiles folder for user group (all user accounts of users who should run Clarity) and local Administrator user account in exactly the same manner (SYSTEM permissions are not required here).
- Repeat this complete procedure for Bin folder for user group (all user accounts of users who should run Clarity), local Administrator user account, and SYSTEM in the similar manner. Be careful as permissions setting for users is different (SYSTEM and local administrator both require full control).
- Each user may create a shortcut to Clarity on their desktop for convenient access.
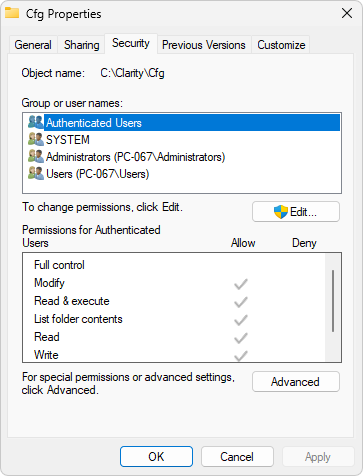
Cfg Folder Security Properties
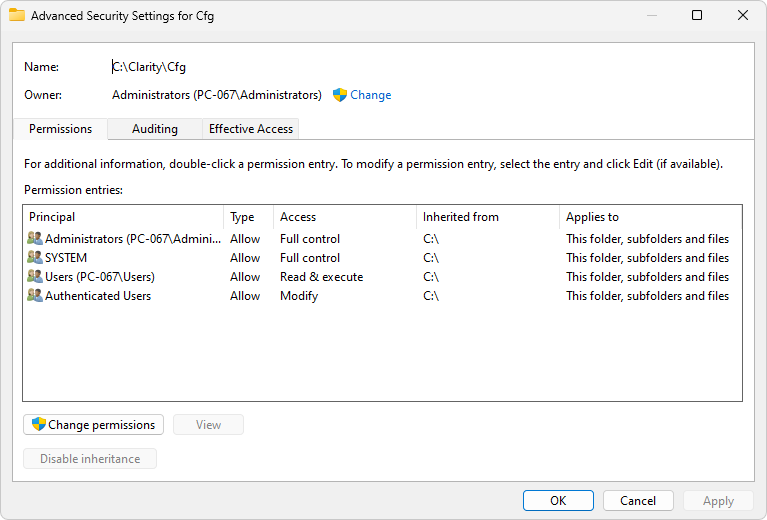
Advanced Security Settings - Initial state
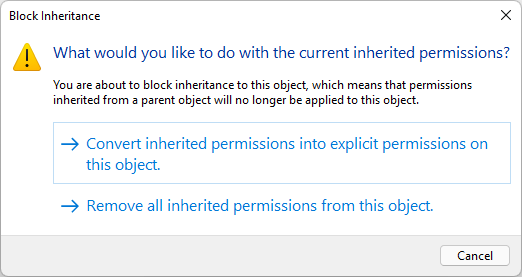
Block inheritance
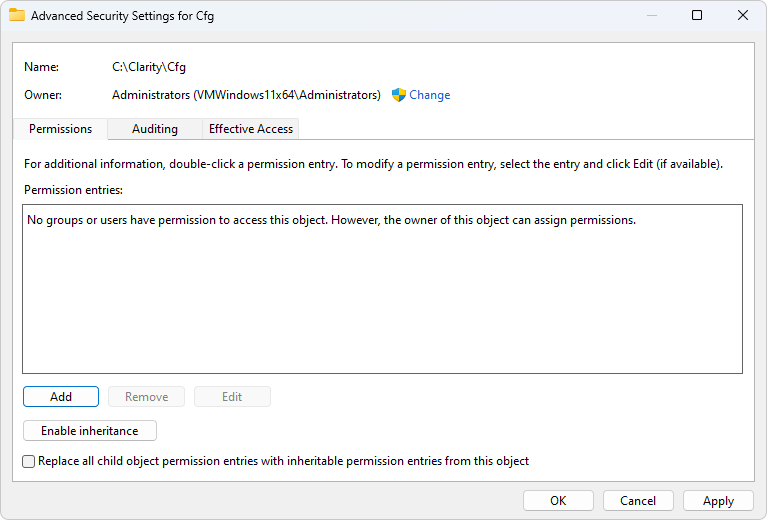
Advanced Security Settings - No Entry
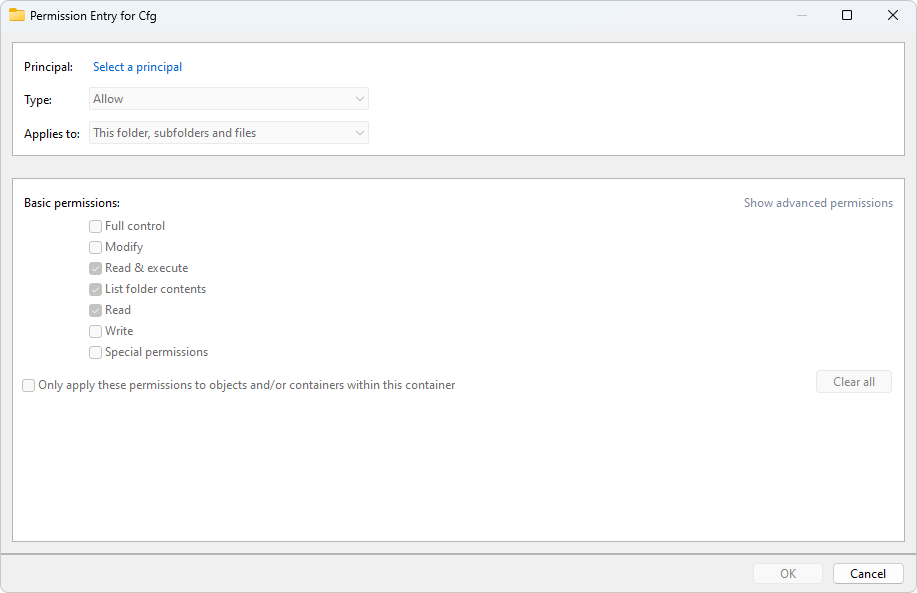
Permission Entry

Select User - Initial
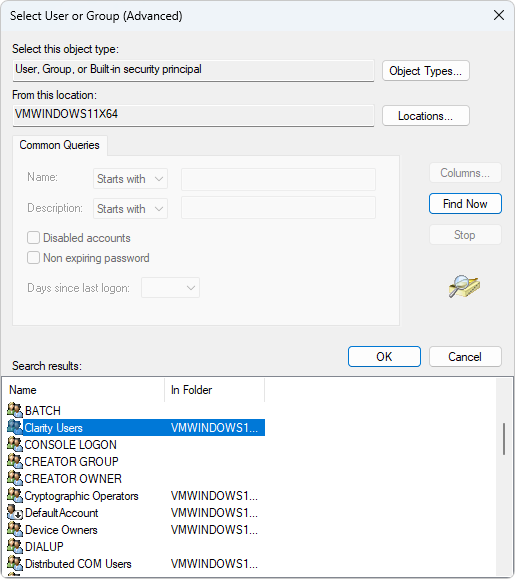
Select User - Advanced
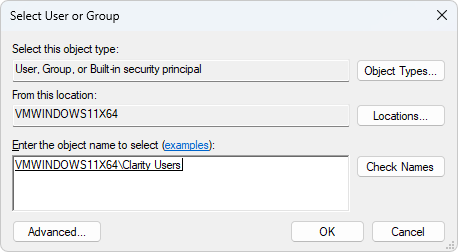
Select User - Final
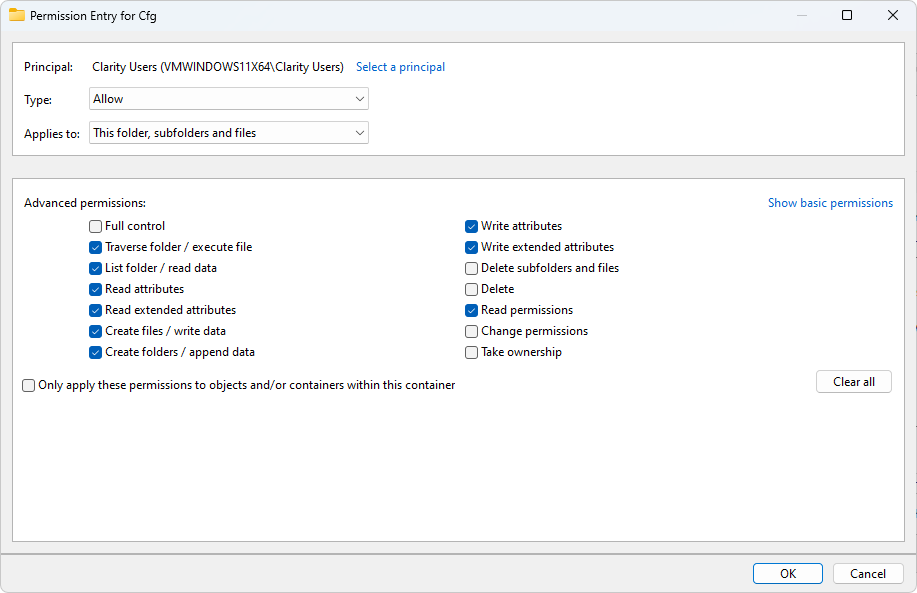
User Permission Entry
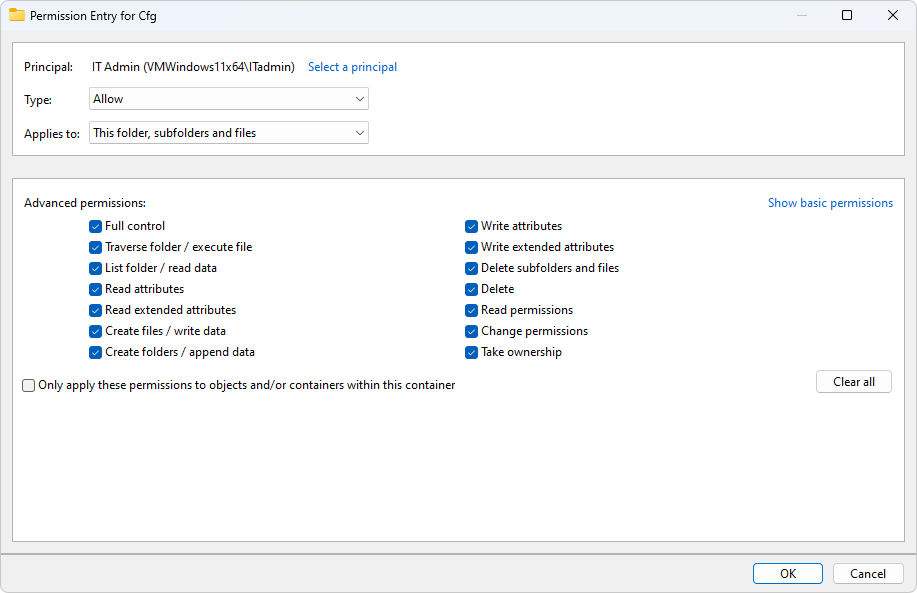
Administrator Permission Entry
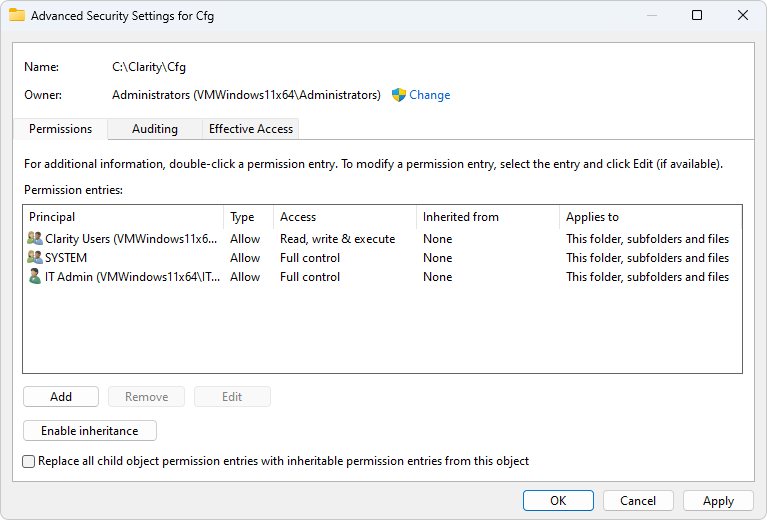
Advanced Security Settings for the Cfg Folder
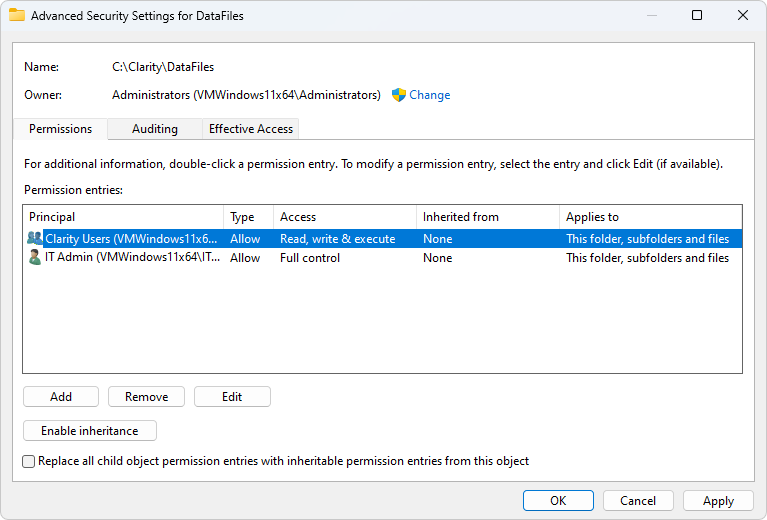
Advanced Security Settings for DataFiles Folder
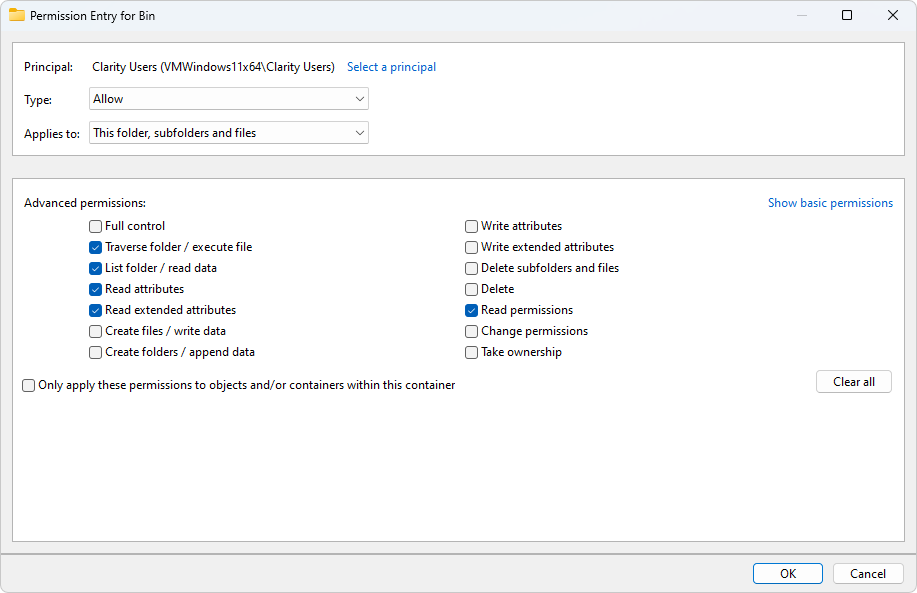
User Permission Entry for Bin Folder
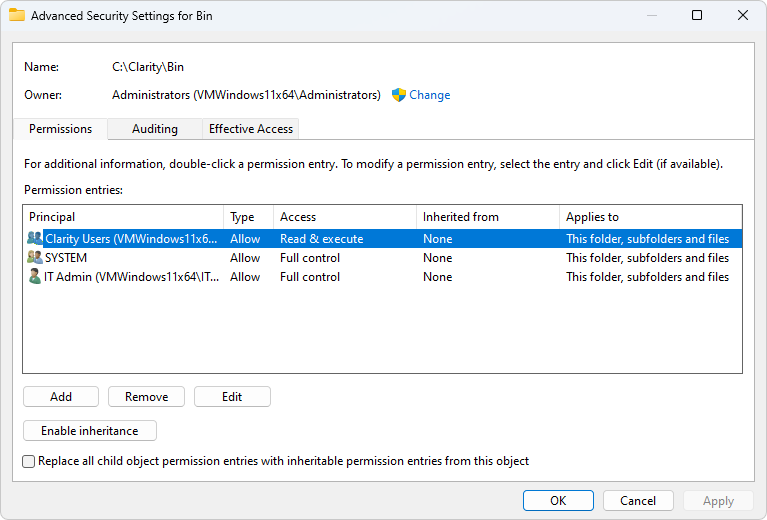
Advanced Security Settings for Bin Folder