This topic describes how to construct a multisignal calibration in Clarity. Below is an example of creating and constructing a three (concentration) level calibration which provides calculation parameters for calculating results in two-signal chromatograms. This procedure should be utilized when different compounds are detected on each signal. In case all signals detect the same compounds there is no need to use On Active Signal option, unless you don't want to quantify all of the compounds on some signals.
Note:
For cases there is need to create and construct more than a two-signal calibration, the applied approach remains the same. It varies from the below procedure slightly. These aspects are reflected in the respective steps of this topic.
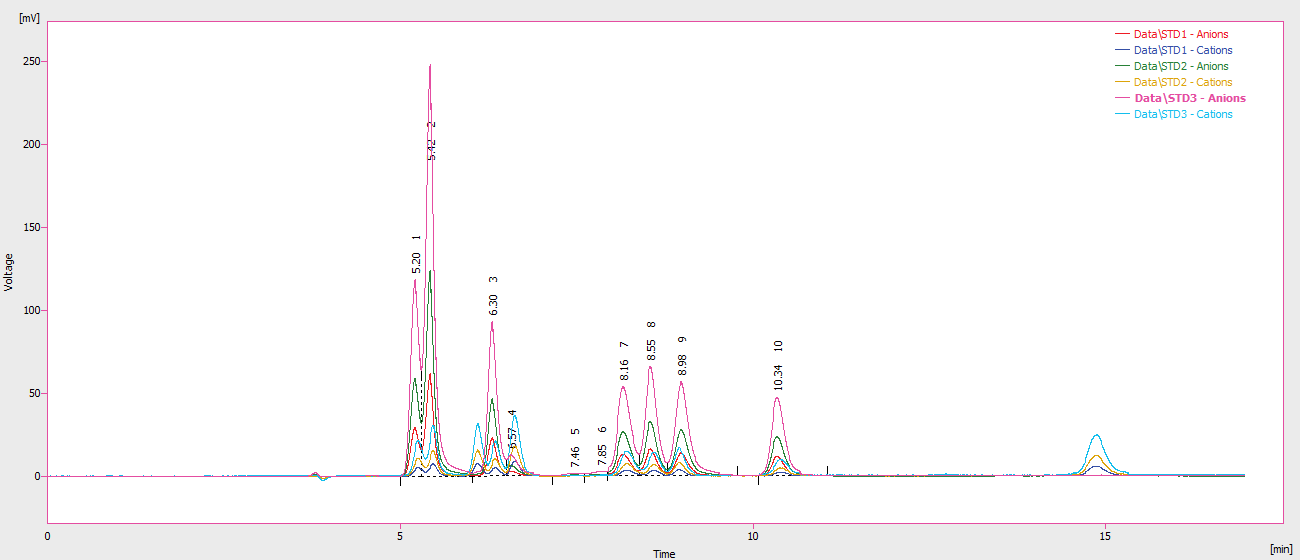
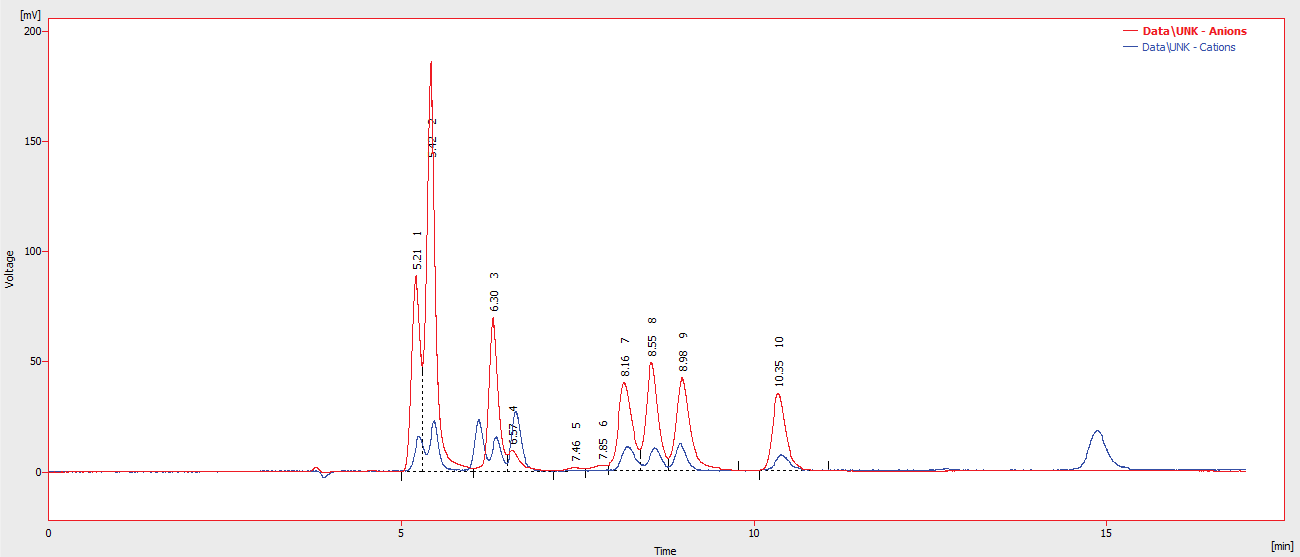
This guide is based on two-signal chromatograms of standards with simulated data (for demonstration purposes it can be said that first signal detects anions and second detects cations) on three concentration levels (5 000 ppm, 10 000 ppm and 20 000 ppm) and one sample chromatogram. All chromatograms used in this guide have been integrated in manner to fit the demonstration purpose.
Prerequisites:
- Integrated chromatograms of standards.
- Integrated chromatogram of sample.
- Open the Calibration window: select Window - Calibration in the Instrument window or click
 .
. - Create a new calibration file: select File - New or click
 ⓐ.
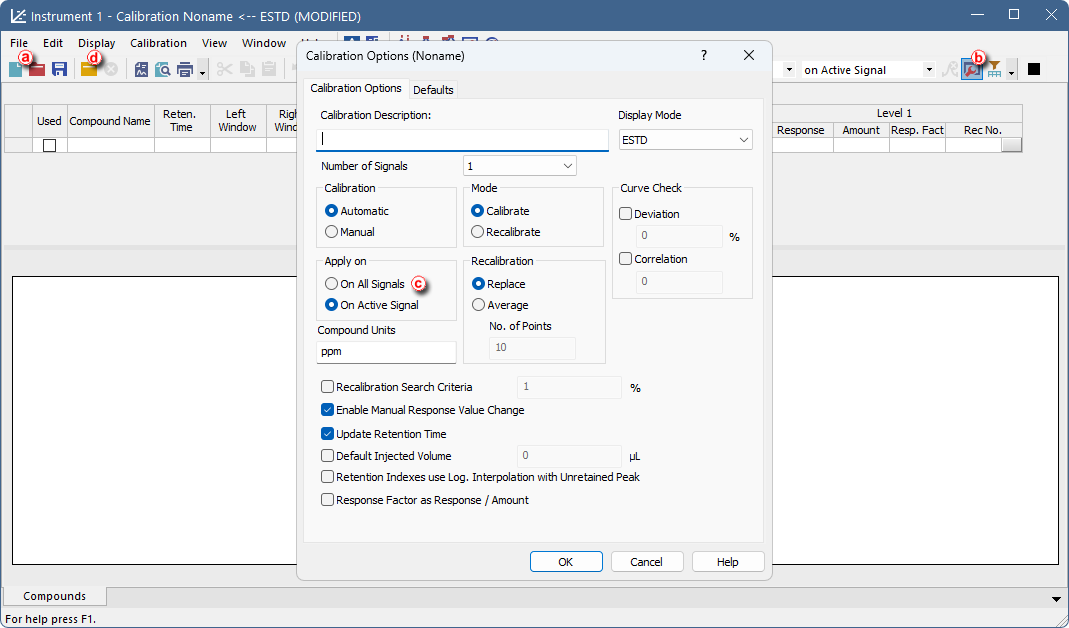
ⓐ. - Open the Calibration Options dialog: select Calibration - Options… or click
 ⓑ.
ⓑ. - Set section Apply on to option On Active Signal field ⓒ.
- Open calibration standard: select File - Open Standard… or click
 ⓓ to open measured and integrated chromatogram with the lowest concentration level where all peaks are available.
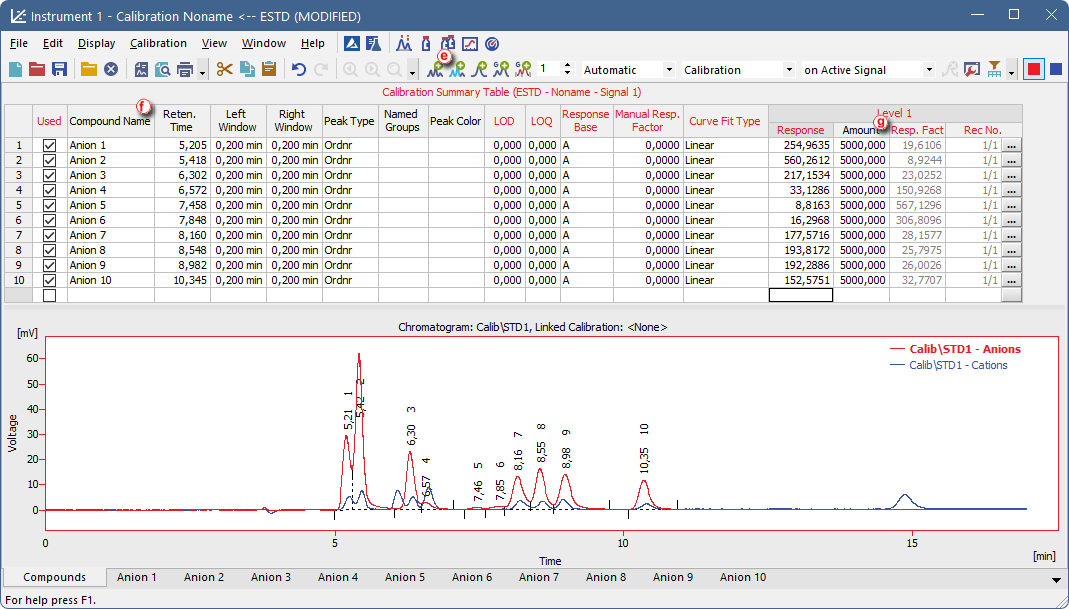
 - Make sure the upper toolbar displays on Active Signal. It is also recommended to make sure you are currently on the first signal as well (focused red square in right part of the upper toolbar).
- Fill the Calibration Summary Table with peaks from the currently selected signal in chromatogram using the Add All
 icon ⓔ.
 - Rename automatically pre-filled names of peaks ⓕ.
- Enter values for given standard into the Amount column ⓖ.
Note:
As mentioned in the beginning. If all peaks in the standard chromatogram represent the same compound across all signals it is viable to change the option to On All Signals. In such case there is no difference in working with multisignal and single signal calibration.
Note:
If only some peaks should evaluated it can be done by using Add Peak  on peaks that need to be included in calibration.
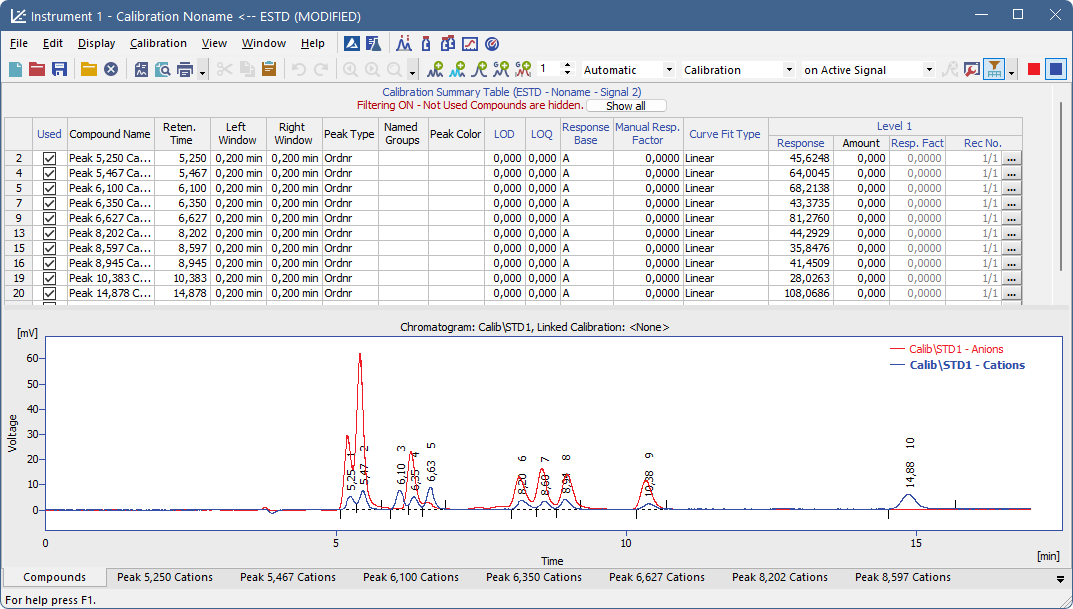
- Switch to the second signal in chromatogram to make it active ⓗ.
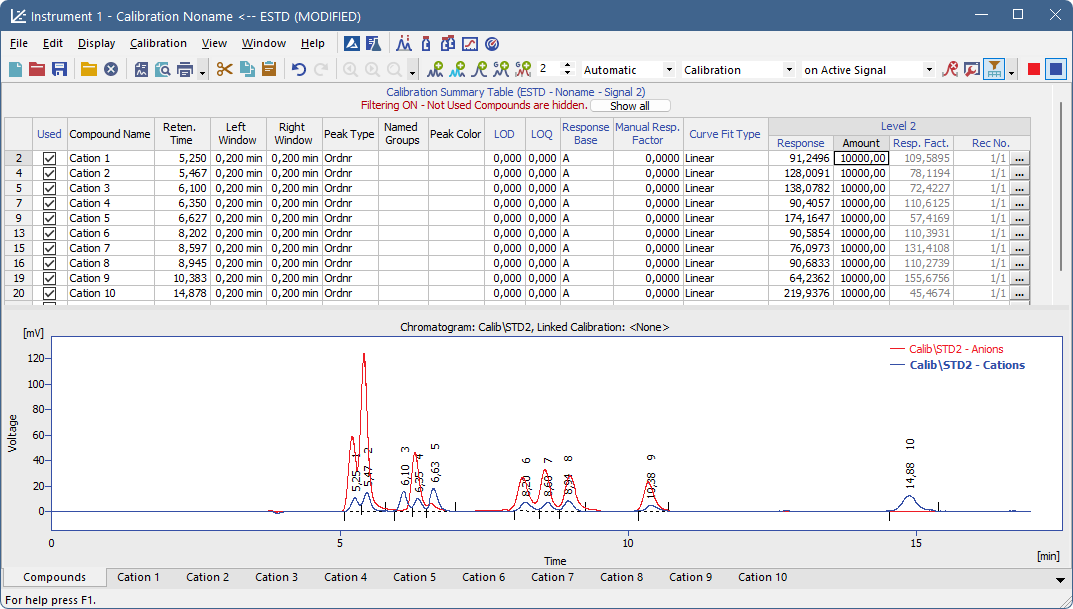
- Optional: Switch the table filter on using Filter Not Used Compounds icon ⓘ. With this option enabled, rows with not Used compounds on given signal are hidden, which makes it easier to navigate Calibration Summary Table.
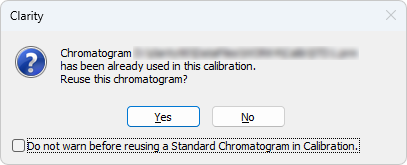
- Fill the Calibration Summary Table with peaks from the currently selected (second) signal in chromatogram using Add All icon. Dialog will be invoked after clicking Add All icon questioning if an already used chromatogram should be reused for this calibration. It is necessary to confirm the reuse by clicking Yes button.
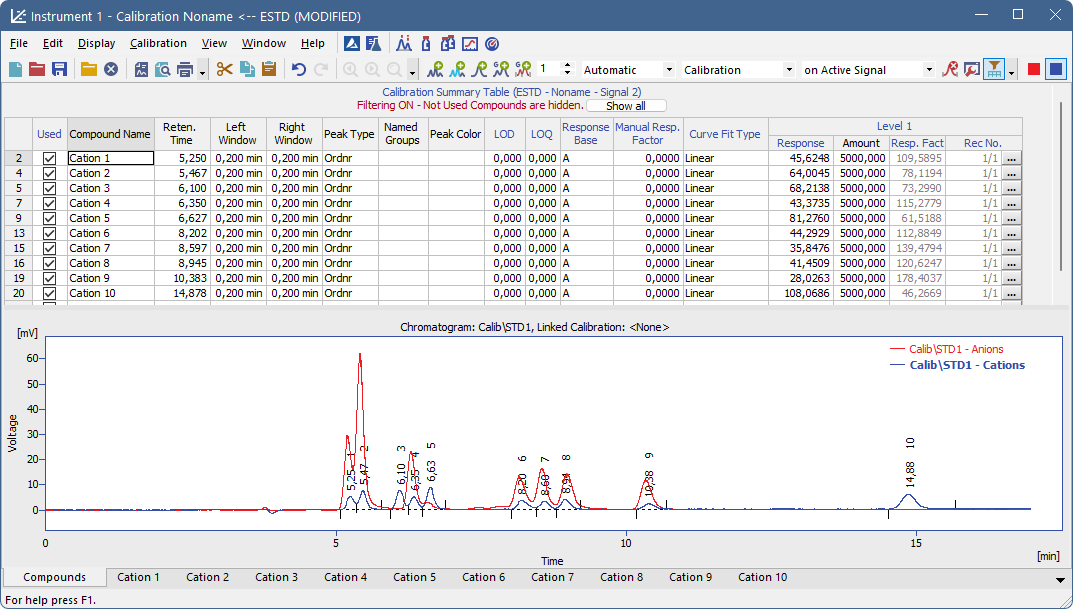
- Rename the automatically pre-filled names in the Calibration Summary Table column.
- Enter values into Amount column. The first concentration level is finished now. It is possible to proceed building up to next levels of calibration.
- Open chromatogram of standard of the next (second) concentration level.
- Fill the next level of Calibration Summary Table with Responses for each signal following the same steps as for Level 1 (Steps 8-16, renaming the compounds is omitted as the names carry over from previous levels).
- Open chromatogram of standard of the next (third) concentration level.
- Fill the Calibration Summary Table in the same manner as for second level (step 18).
- When calibration is finished do not forget to save it using select File - Save or click on
 .
. - For calculating result in sample open the Chromatogram window select Window - Chromatogram on the Instrument window or click on
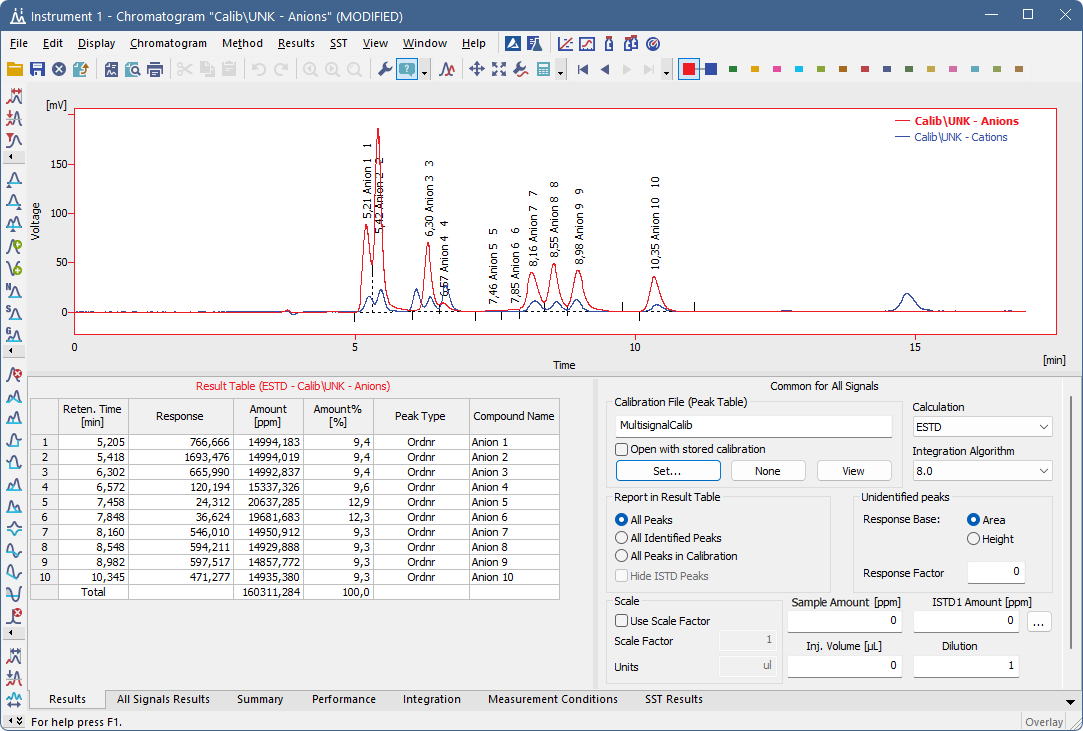
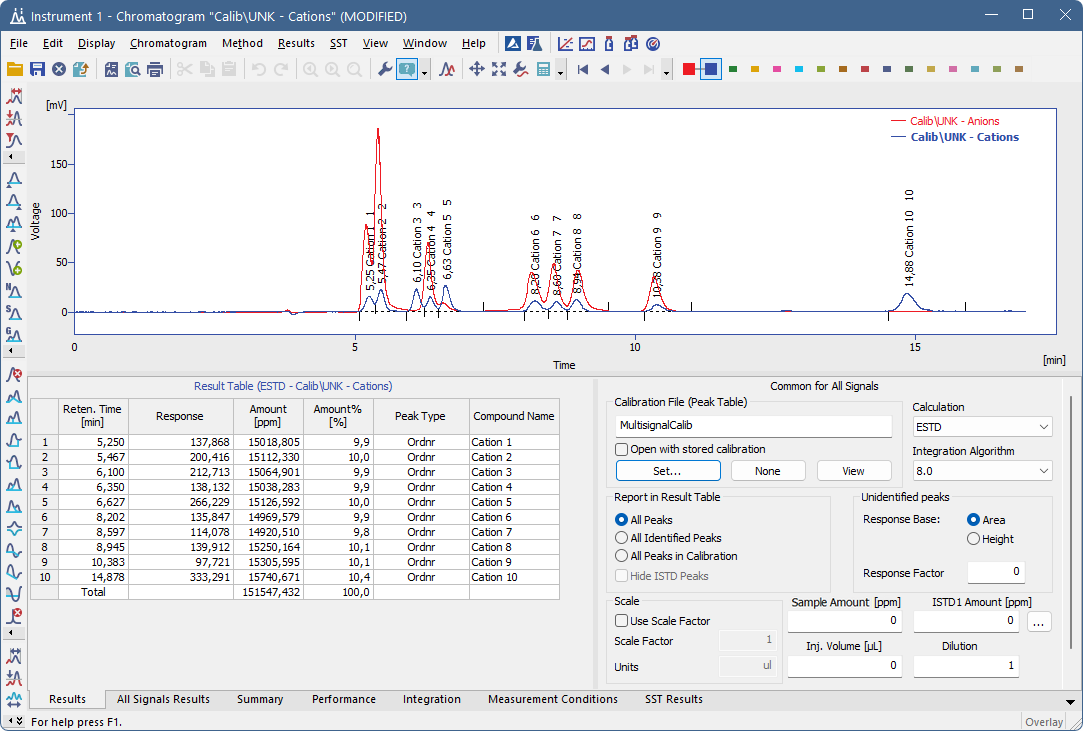
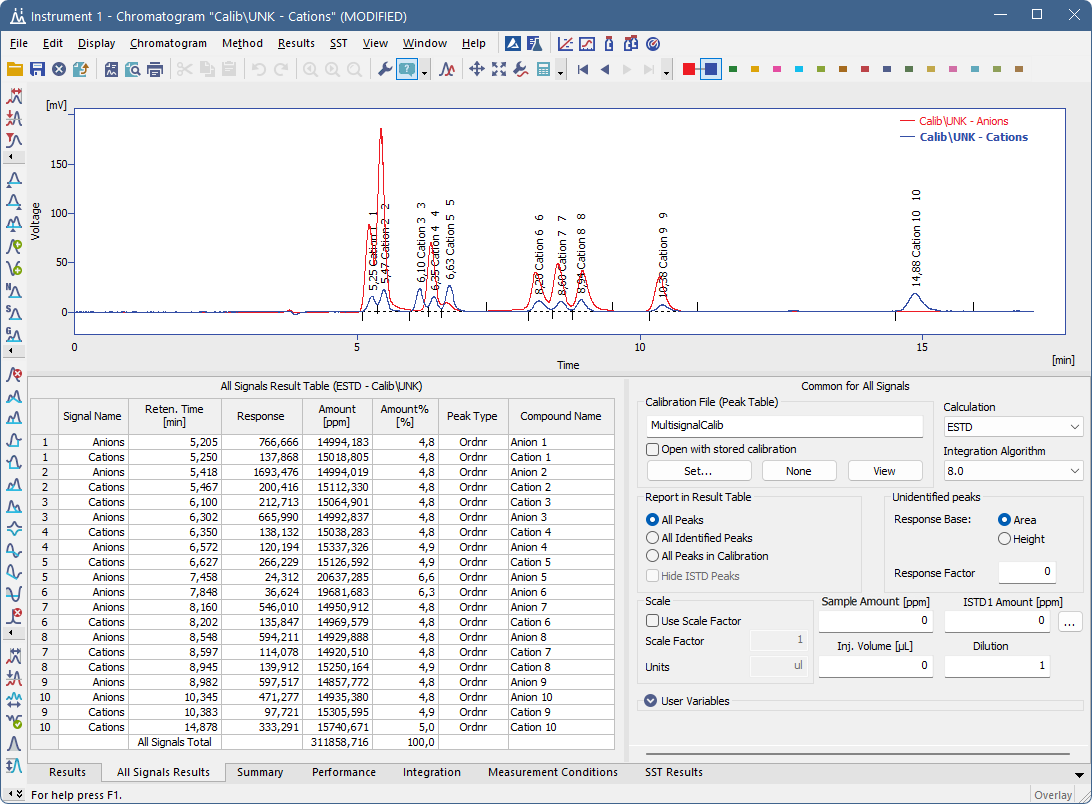
 and open chromatogram of sample and link the calibration to chromatogram.
 - Review results on Results Table of each individual signal or review results for all signals on All Signals Results Table.

Note:
In case of constructing calibration with more than two signals, steps 12 and 14 have to repeated as many times as necessary in order to fill in peaks from all signals to Calibration Summary Table.
Note:
This dialog will be invoked multiple times based on number of signals in calibration for calibration with more than two signals. It is possible to switch off invoking of the dialog using the checkbox in the bottom of the dialog.
Note:
Which signal of chromatogram is active and is being worked with is given by the Calibration Summary Table title's color and displayed number of currently active signal.
Note:
All rows of Amount column have to be filled in.
Note:
Add Existing  can be used instead of Add All . This command only adds response for peaks that are preset on first level. This means that extra peaks (or peaks chosen not to be evaluated) that are present in the second (and later) standards, but not in the first one will not be added.

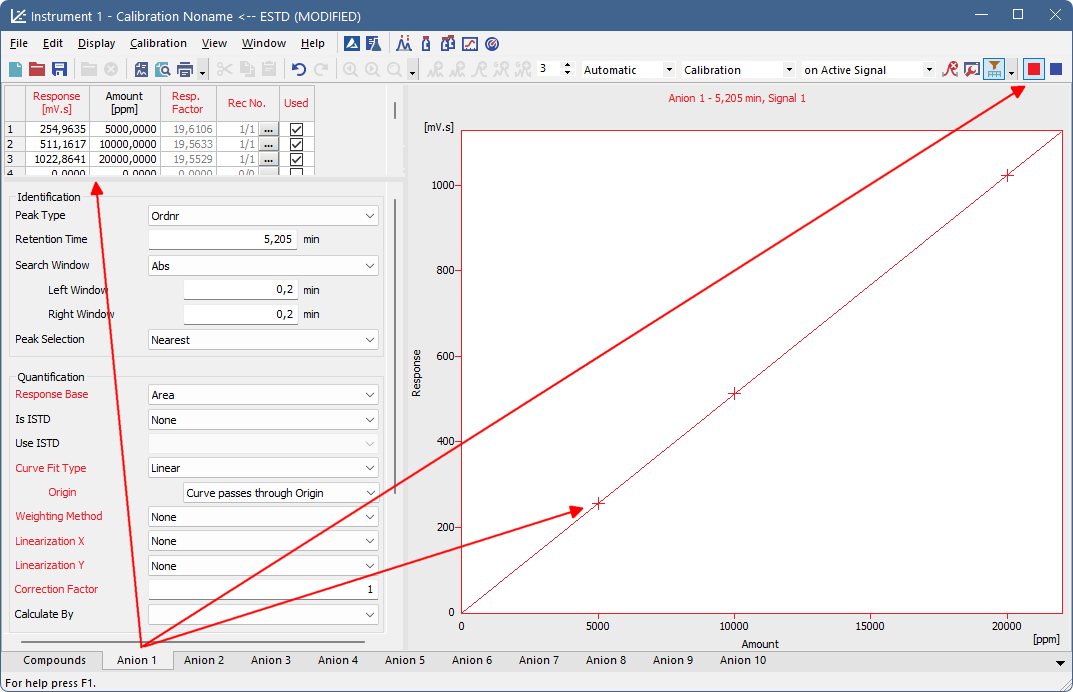
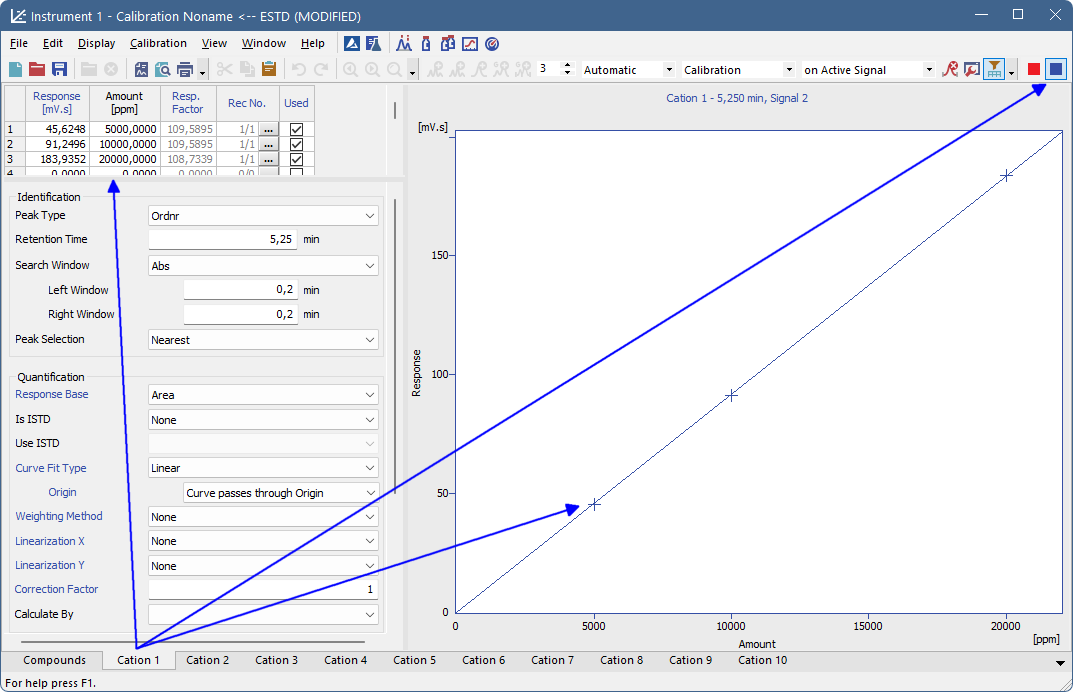
Note:
It is possible to review calibration curves for each compound on the respective tabs of individual compounds. Notice that calibration curve are displayed only for valid signal (When filtering is enabled tabs of individual compounds are displayed only on signal where they are used). Signal selection is located in right upper corner of the Calibration Window.